Manage documents
You accountant will upload documents for you and you can view them in the Documents area of the portal. You also have the option to upload any documents that you want your accountant to have access to. You can also delete documents that are no longer required.
Contents
View a file
When your accountant uploads a file into your portal, you receive an e-mail notification and the file appears in your portal. Within your portal, you can access the new file in two ways. Click the View files link on the Home page. Alternatively, if you choose to browse via the Documents menu, the new file name displays at the top of the Documents page. Once you open the file, it will disappear from the View files section.
- Select one of these methods to access the document
- To view a list of unread files, click the Documents menu.
-
To view a file you have already read, click the Documents menu, then click the folder that contains the file, if applicable.
-
Click the Documents menu and search for the document file name.
- Select one of these options:
- To view a single file, click the file - it downloads to your computer.
-
To download multiple files simultaneously, select the List view, then select the check boxes of those files and click Download.
- Open the downloaded file. If multiple files were selected, the downloaded file will be a .zip file.
-
You can change your view in Portal to display files as the List view or as the Thumbnails view.
-
To change your view, select
 for the List view or
  for the Thumbnails view.
-
Upload files
When you upload files to your portal, your accountant is notified via e-mail. A message containing links to the different uploaded files will then be sent to the accountant.
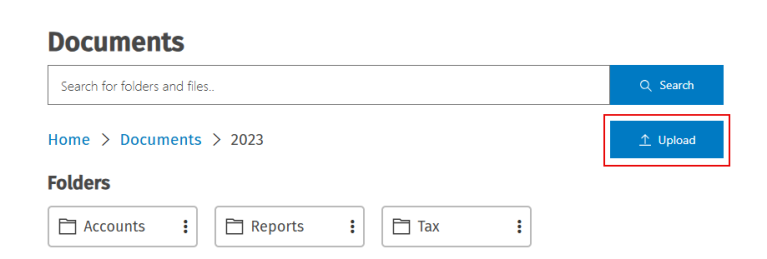
- Click Documents.
- Click the folder you want to upload documents to, if applicable.
- Click the Upload button.

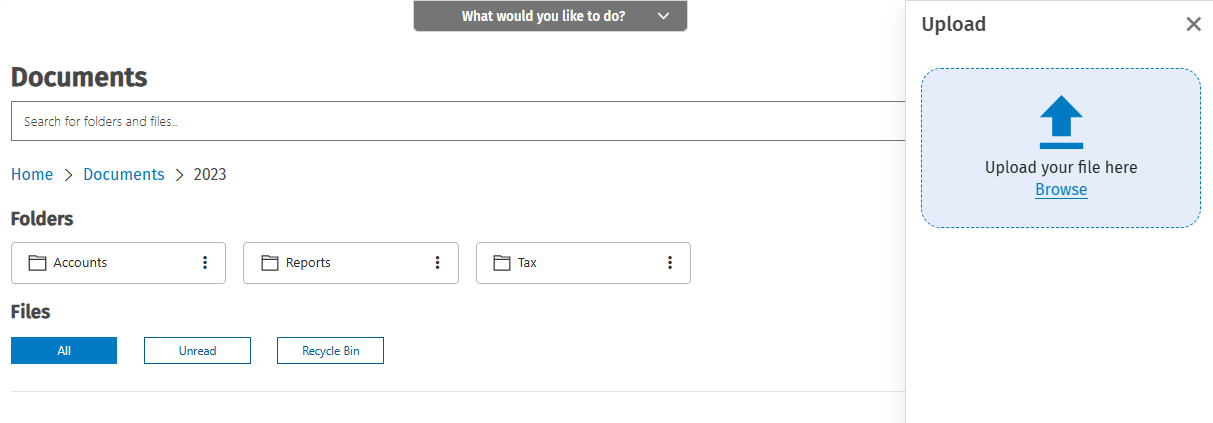
- In the Upload dialog box, click Browse, then locate the file(s) you want to upload - you can upload one or more files at the same time.
- Click Open to uploaded the files to the portal.
Note: You can also drag and drop the files you want to upload into the Upload your file here section of the Upload screen.
The maximum size of a file that you can upload is 1 GB.
If you are using a mobile device, you can take a picture and upload it into the portal. Existing pictures can also be uploaded into the portal.
Delete a file
When you delete a file from a client portal, it is moved to the Recycle Bin.
- Access the portal.
- Click Documents.
- To delete an individual file:
- From the List view, select the file and select Delete from the
 menu. Then, click Yes to confirm.
 - From the Thumbnails view, click the
 menu and select Delete. Then, click Yes to confirm.
- From the List view, select the file and select Delete from the
-
To delete files in bulk, select the related check boxes in the List view and select Delete from the
 menu. Then, click Yes to confirm.
